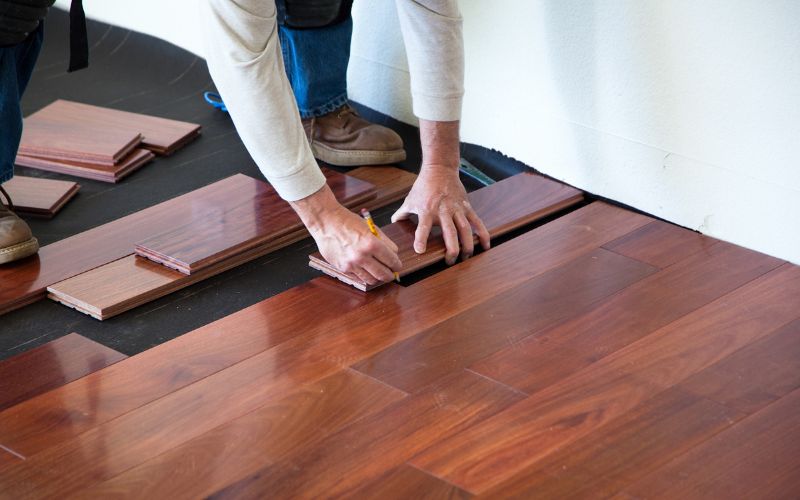
Preparing Your Subfloor: The Key to a Flawless Hardwood Installation

Installing hardwood floors can transform the look and feel of any room, but the secret to achieving that flawless, long-lasting finish isn’t just in the hardwood planks themselves—it’s all about the subfloor. A properly prepared subfloor lays the foundation for a smooth, stable, and durable hardwood floor that will stand the test of time. Let’s dive deeper into the steps needed to ensure your subfloor is ready for a perfect hardwood installation.
Step 1: Assess the Condition of Your Subfloor
The first step in preparing your subfloor is assessing its current condition. Take a close look at the surface—are there any cracks, dips, uneven spots, or areas that feel weak? Subfloor damage or irregularities will affect how the hardwood sits, potentially leading to issues like squeaks, cracks, and buckling.
If your subfloor is made of plywood, OSB (oriented strand board), or concrete, check for signs of water damage, warping, or rot. Concrete subfloors should also be inspected for cracks and moisture. If you find damage, now is the time to fix it. Uneven subfloors can be leveled out using a self-leveling compound or a professional patching solution. It’s crucial to get this part right, as an uneven surface can cause the hardwood to shift, creating gaps or causing the boards to wear unevenly over time.
Tip: Homes in Portland, ME, often face unique challenges due to the region’s humidity and fluctuating temperatures. If you’re unsure of your subfloor’s condition, professionals who specialize in hardwood flooring services Portland ME can help assess and make necessary repairs before the installation process begins.
Step 2: Ensure the Subfloor is Clean and Dry
Next up, cleanliness is key. Before laying down any hardwood, your subfloor should be completely clean and free of debris. Dust, dirt, and other small particles can create bumps under the hardwood, preventing the planks from sitting evenly. Start by sweeping and vacuuming the subfloor to remove any loose debris, then follow up with a thorough wipe-down using a damp cloth or mop.
Just as important as cleanliness is dryness. Wood and moisture don’t mix well, and even a small amount of trapped moisture can cause your hardwood to warp, expand, or swell. If you’re working in a basement or an area prone to moisture (like a kitchen or bathroom), it’s essential to check for damp spots. Consider using a moisture meter to test the subfloor, especially if you’re installing hardwood on a concrete subfloor.
For added protection, particularly in areas that see a lot of moisture, consider applying a moisture barrier, like a polyurethane or underlayment designed for waterproofing. This extra step can help prevent moisture from creeping up into the wood planks.
Step 3: Check for Proper Subfloor Thickness and Material
A solid subfloor not only ensures that your hardwood planks sit evenly but also provides the necessary support for foot traffic. Most hardwood flooring manufacturers recommend a subfloor thickness of at least ¾ inch for traditional hardwood. This thickness provides the support needed for the planks to resist sagging or bowing under weight.
If your subfloor is thinner, you may need to reinforce it by adding a layer of plywood or underlayment to achieve the desired thickness. Some homeowners also have engineered hardwood installed, which can sometimes be installed over a thinner subfloor, but this varies based on the specific flooring and underlayment used.
For those with concrete subfloors, extra care must be taken to ensure that the concrete is level, dry, and free of cracks. Concrete subfloors often require the installation of a vapor barrier or plywood sheathing before hardwood can be installed.
Step 4: Install the Right Underlayment
Underlayment is an often overlooked yet crucial component of hardwood floor installation. Acting as a cushion between the subfloor and the hardwood, underlayment helps absorb sound, provides extra comfort underfoot, and protects against moisture.
There are different types of underlayment to choose from, depending on your hardwood and subfloor type. Foam underlayment is commonly used for engineered hardwood or floating floors, while cork underlayment offers a bit more cushion and soundproofing. For areas prone to moisture, such as basements or first floors, a vapor barrier or a moisture-resistant underlayment is essential.
Underlayment is also great for hiding any minor imperfections in the subfloor, adding an extra layer of insulation to help with noise reduction, and preventing squeaks.
Step 5: Acclimate the Hardwood to the Room
Once the subfloor is prepped and ready, the hardwood itself needs some time to adjust. Hardwood is a natural material that expands and contracts with changes in temperature and humidity. To prevent issues like gapping or warping after installation, it’s important to let the wood acclimate to the room where it will be installed.
Bring the hardwood planks into the space and leave them there for at least 3 to 5 days. This gives the wood a chance to adjust to the room’s climate. Be sure that the room is kept at a stable temperature and humidity level during this time to avoid drastic changes once the flooring is in place.
Trust the Experts for a Flawless Installation
Prepping your subfloor may seem like a tedious task, but it’s the most important step in ensuring your hardwood floors turn out flawless. Skipping any of these steps or cutting corners can lead to future headaches like creaking floors, gaps between boards, or worse—costly repairs.
If you’re not confident in your subfloor prep or you’d like expert help, reaching out to professionals in hardwood flooring services in Portland ME is your best bet. They’ll ensure your subfloor is properly assessed, repaired, and prepped for a beautiful hardwood installation that will last for decades. Whether you’re renovating a historic Portland home or upgrading your modern living space, a well-prepared subfloor is the foundation for long-lasting, stunning hardwood floors.


