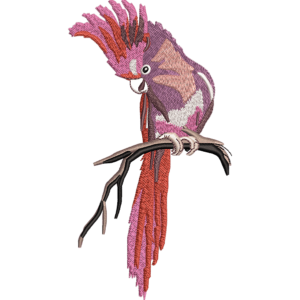
Advanced Techniques for Machine Embroidery Digitizing

Machine embroidery digitizing has revolutionized the way intricate designs are brought to life on fabric. While the basics of digitizing focus on converting artwork into stitch files, advanced techniques take creativity and precision to new heights. Whether you’re a seasoned digitizer or a business providing digitizing services, mastering advanced techniques can elevate your craft and set you apart from competitors.
In this guide, we’ll delve into advanced techniques for machine embroidery digitizing, highlighting practical tips, innovative strategies, and answers to frequently asked questions.
Why Advanced Techniques Matter
Incorporating advanced techniques allows you to:
- Enhance Design Quality: Achieve professional results with precise detailing.
- Expand Capabilities: Handle complex patterns and multi-layered designs.
- Increase Efficiency: Minimize errors and streamline the digitizing process.
- Boost Creativity: Explore innovative designs that push the boundaries of traditional embroidery.
For businesses offering digitizing services, these techniques ensure customer satisfaction and a reputation for excellence.
Key Advanced Techniques for Machine Embroidery Digitizing
1. Mastering Stitch Direction
The direction of stitches significantly impacts the texture, appearance, and structural integrity of a design.
- Varied Angles: Use different stitch angles to create depth and dimension.
- Smooth Transitions: Adjust stitch directions in gradients to mimic natural textures like fur or waves.
2. Incorporating Complex Stitch Types
While basic stitch types are fundamental, advanced techniques involve mastering specialty stitches:
- 3D Puff Embroidery: Adds a raised effect for bold designs like logos or monograms.
- Cross-Stitch Effect: Mimics traditional hand-stitched cross-stitch patterns.
- Motif Stitches: Customizable patterns embedded into the embroidery design.
3. Digitizing for Multi-Color Designs
Multi-color designs require precise layering and color transitions.
- Color Blending: Use gradient fill stitches for seamless color transitions.
- Thread Management: Minimize thread changes by sequencing colors efficiently.
- Registration Marks: Ensure perfect alignment when dealing with multiple hoopings.
4. Utilizing Advanced Underlay Techniques
Underlay stitches form the foundation of any design. Advanced techniques include:
- Double Underlay: Combines edge-walk and zigzag underlays for extra stability.
- Variable Underlay Density: Adjust underlay density based on fabric type and design size.
5. Creating Intricate Details
High-detail designs demand precision and creativity. Tips for success:
- Micro-Stitches: Use shorter stitches for fine details.
- Thread Thickness: Opt for thinner threads (e.g., 60wt) for intricate elements.
- Layering Techniques: Build complexity by overlaying stitch patterns.
6. Digitizing for Specialty Fabrics
Different fabrics require tailored digitizing techniques to ensure quality results.
- Stretch Fabrics: Use lower density and strong stabilizers.
- Sheer Fabrics: Opt for lightweight designs and minimal underlay.
- Heavy Fabrics: Increase stitch density and use durable threads.
7. Using Software Tools for Precision
Leverage advanced software features to enhance your designs:
- Auto Digitizing: Quickly convert complex artwork into embroidery files with minimal manual input.
- Object Mapping: Assign different stitch types to specific areas for greater control.
- Stitch Simulation: Preview the design in stitching mode to detect potential issues.
Challenges in Advanced Machine Embroidery Digitizing
While advanced techniques offer numerous benefits, they come with challenges:
- Balancing Complexity and Practicality: Over-complicated designs can lead to thread breaks or distorted stitches.
- Managing Stitch Count: High stitch counts increase production time and cost.
- Avoiding Fabric Damage: Advanced designs on delicate fabrics may cause tearing or puckering.
Solutions to Overcome Challenges
- Conduct thorough testing on similar fabrics.
- Regularly maintain your embroidery machine to prevent malfunctions.
- Collaborate with clients to refine designs for feasibility.
Best Practices for Advanced Digitizing Services
1. Understand the Client’s Vision
Before digitizing, ensure you understand the intended outcome, including fabric type, design purpose, and size.
2. Stay Updated with Trends
Innovative techniques like 3D puff embroidery or applique digitizing are increasingly popular. Incorporate them into your offerings to attract a diverse clientele.
3. Invest in High-Quality Software
Professional software like Wilcom EmbroideryStudio, Hatch, or Brother PE-Design enables greater precision and creativity in your designs.
4. Maintain Quality Assurance
Implement rigorous quality checks to ensure your designs meet industry standards before production.
Conclusion
Mastering advanced techniques in machine embroidery digitizing is essential for producing high-quality, professional results. Whether you’re exploring intricate stitch patterns, creating multi-color designs, or adapting to specialty fabrics, these techniques allow you to push the boundaries of creativity and precision.
For those offering digitizing services, staying updated with advanced methods and leveraging professional tools will not only enhance your skills but also position you as a leader in the embroidery industry. With practice, dedication, and innovation, your digitized designs can transform into stunning stitched masterpieces.
FAQs About Advanced Machine Embroidery Digitizing
1. What is machine embroidery digitizing?
Machine embroidery digitizing is the process of converting artwork into a digital file that guides an embroidery machine in stitching the design onto fabric.
2. What are advanced techniques in digitizing?
Advanced techniques include mastering stitch direction, using complex stitch types, digitizing for multi-color designs, and tailoring designs for specialty fabrics.
3. Can advanced techniques be applied to any fabric?
Yes, but each fabric type requires specific adjustments in stitch density, underlay types, and stabilizers to achieve the best results.
4. How do I ensure my design doesn’t pucker?
To prevent puckering:
- Use appropriate stabilizers.
- Adjust stitch density and tension.
- Test the design on a sample fabric.
5. What software is best for advanced embroidery digitizing?
Professional-grade software like Wilcom EmbroideryStudio, Hatch, or Brother PE-Design offers features for advanced digitizing techniques.
6. How do I add 3D effects to my design?
Use 3D puff embroidery techniques with foam underneath the stitches to create raised effects. Ensure your design and stitch density are optimized for this method.
7. What is the role of underlay stitches in digitizing?
Underlay stitches stabilize the fabric, provide a foundation for top stitches, and prevent puckering or distortion.
8. Can I automate advanced digitizing techniques?
While many software programs offer automation features, manual adjustments are often necessary for precise, high-quality results.


