Trophy Manufacturing Process: A Step-by-Step Breakdown

nandan


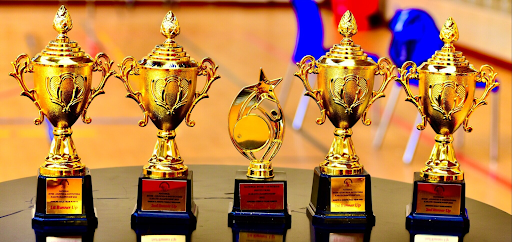
Trophy manufacturing is a fascinating process that involves creativity, precision, and attention to detail. Whether it’s for sports tournaments, corporate events, or academic achievements, trophies have been an integral part of recognizing and celebrating success. In this article, we’ll take you through the step-by-step breakdown of how trophies are made.
The first step in trophy manufacturing is designing. This involves brainstorming ideas to create a unique and visually appealing design that aligns with the purpose of the trophy. The design phase also includes selecting the appropriate materials and size for the trophy.
The materials used in trophy manufacturing can vary depending on factors such as budget, purpose, and desired aesthetic. Some common materials used include:
The type of material used can also affect the manufacturing process and techniques required. For example, metal trophies may require molding and casting techniques, while wooden trophies may need carving and sanding.
Once the design has been finalized, it’s time to bring it to life. Skilled sculptors use various tools and techniques to carve the design into a clay or wax model. This step requires great attention to detail, as any imperfections in the sculpture will reflect in the final product.
Sculptors use different tools for shaping the clay or wax, such as loop tools, wire-end tools, and carving knives. Each tool has a specific purpose and is used to achieve different textures and details in the sculpture. For example, loop tools are ideal for creating smooth finishes while carving knives are better suited for adding intricate details.
Aside from traditional sculpting tools, modern technology has also introduced 3D printing into the process of sculpting. With 3D printing, artists can create detailed digital models that can be transformed into physical sculptures using various materials like resin or metal.
Another technique commonly used by sculptors is “reduction,” which involves removing layers of material to create the desired shape and form. This process allows for more control and precision in creating the sculpture.
While traditional sculptures are typically made from clay or wax, modern sculptors have a wide range of materials at their disposal. Some common materials used in sculpting include stone, wood, metal, and resin. Each material has its own unique properties that can add depth and texture to the sculpture.
For example, stone is a popular choice for large-scale outdoor sculptures due to its durability and resistance to weathering. Wood provides a softer texture and can be easily carved into intricate details, while metal offers strength and the ability to create smooth surfaces.
After the sculpture has been completed, it’s time to add the finishing touches. This step involves refining the surface of the sculpture, filling in any gaps or imperfections, and adding a protective coating.
One common finishing technique is “patination,” which involves applying chemicals to the surface of metal sculptures to create various colors and textures. This adds depth and character to the sculpture while also protecting it from corrosion.
Other techniques used for finishing include sanding, polishing, and painting. These final touches help bring out the details and enhance the overall aesthetic of the sculpture.
The next step is creating a mold of the sculpted model. A liquid material is poured over the model, which then hardens, leaving an exact replica of the sculpture.
After the mold has been made, it’s time for casting. Molten metal, usually bronze or resin, is poured into the mold to create a solid trophy. The molten metal fills in every crevice of the mold, ensuring a flawless finish.
Once the casting is complete, the trophy goes through a series of finishing processes. This includes buffing, sanding, and polishing to give it a smooth and shiny surface. Any excess metal is also removed during this stage.
The final product may look complete at this point, but there are still some details left to add. Depending on the design, additional elements such as plates, engravings, or gemstones may be added to enhance the overall appearance of the trophy.
These details can be added using various techniques such as engraving, stamping, or gem setting.
Engraving is a technique used to add text or designs into the surface of the trophy. This can be done by hand using specialized tools, or with the use of laser technology for more precise and intricate designs. Engraving is commonly used to add names of winners or special messages onto trophies.
Stamping involves using a metal die to create an impression on the surface of the trophy. This technique is commonly used to add logos, symbols, or other designs onto trophies. Stamping can also be combined with enamel coloring to add color and vibrancy to the design.
For a more luxurious and eye-catching effect, gemstones can be added to the trophy. This is commonly seen in sports trophies where precious stones are used to represent various achievements or milestones. Gem setting requires careful placement and securing of the stones onto the trophy using prongs or adhesive.
The last step in trophy manufacturing is painting and assembly. The trophy is carefully painted by hand, using high-quality paints and precision techniques to ensure a flawless finish. Different parts of the trophy are then assembled together, including any bases or stands.
Trophy manufacturing involves several intricate steps that require skilled artisans to bring a simple design into an exquisite work of art. From conceptualization to assembly, each stage in the process plays a crucial role in creating a beautiful and meaningful trophy that will be cherished for years to come. So next time you hold a trophy in your hands, remember the effort and craftsmanship that went into making it! So why not take a moment to appreciate the hard work and dedication put into every single trophy?

All Rights Reserved © 2023
