Digitizing Photos for Print: Ensuring Quality and Clarity

emdigitizing


In the world of printing and embroidery, digitizing photos is a critical process that ensures the image is reproduced with precision and high quality. Digitizing a photo means converting it from its analog or digital format into a file that can be printed or embroidered accurately. While the process may seem straightforward, ensuring quality and clarity requires an understanding of both technical and artistic aspects.
This blog will explore how to digitize photos for print while maintaining clarity and quality, and how embroidery digitizing services come into play when the goal is to transfer these images onto fabric. Whether you are printing a family portrait, a brand logo, or an intricate design, following the right steps in the digitization process is essential.
Photo digitization is the process of converting physical images, such as photographs, artwork, or printed images, into digital files. This can be done through scanning or using digital cameras. Once digitized, these files can be edited, resized, and prepared for print or embroidery.
When digitizing for print, ensuring that the image retains its quality is vital. A poorly digitized image will result in a pixelated, blurry, or distorted print, defeating the purpose of capturing the detail in the first place. Similarly, in embroidery digitizing, converting a photo into an embroidery-ready format requires specialized software and attention to detail, so the final product reflects the image accurately.
Resolution plays a key role in the quality of a digitized image. The resolution is measured in DPI (dots per inch) for print and PPI (pixels per inch) for digital formats. Higher DPI or PPI means that there are more dots or pixels in the image, which translates to a clearer and more detailed photo.
For print, a resolution of at least 300 DPI is considered standard for ensuring high-quality images. If the resolution is too low, the image will appear pixelated when enlarged for print. Therefore, always start with the highest resolution possible when digitizing photos for print.
Color accuracy is another critical aspect of quality in photo digitization. The colors in a photo may look different when printed compared to how they appear on a digital screen. This is due to the differences in color spaces used for digital and print media. While screens use RGB (Red, Green, Blue) color space, printers use CMYK (Cyan, Magenta, Yellow, Key/Black).
To ensure color accuracy, it’s essential to convert the digitized image into the correct color space before printing. Professional editing software like Adobe Photoshop or GIMP allows you to adjust the color profile and make corrections to match the intended print output.
Choosing the right file format is crucial when digitizing photos for print. The most common formats for high-quality prints are TIFF and PNG. These formats retain all the image data without compressing it, ensuring that the quality remains intact.
For embroidery digitizing, the file formats differ. Embroidery machines require specific file formats, such as DST, PES, or JEF, to translate the image into stitches. If you’re working with embroidery digitizing services, they will usually handle the conversion to the appropriate format.
The first step is selecting the photo you want to digitize. The quality of the original image significantly impacts the final result. Ensure the photo is clear, well-lit, and free from damage or wear. If you are working with an older photo, it may require some restoration before digitizing.
If you are digitizing a physical photo, use a high-resolution scanner to capture every detail. Set the DPI to at least 300 for prints, but for larger formats or more detailed prints, consider scanning at 600 DPI or higher. Clean the scanner glass to prevent dust or smudges from affecting the image.
For digital photos, ensure that the image is already in high resolution. If the digital file is too small or low-quality, it may not produce a clear print when enlarged.
Once the photo is digitized, you may need to edit it to enhance its quality. Common adjustments include:
If the photo needs to be resized, ensure that the aspect ratio is maintained to prevent distortion. When resizing for print, it’s essential to keep the resolution in mind. Increasing the size too much can result in a loss of quality, leading to pixelation. Use professional editing software to resize the image without compromising on clarity.
After editing, save the image in a high-quality format, such as TIFF or PNG, to preserve all the details. If you’re working with embroidery digitizing services, they will guide you on the file format required for the embroidery machine.
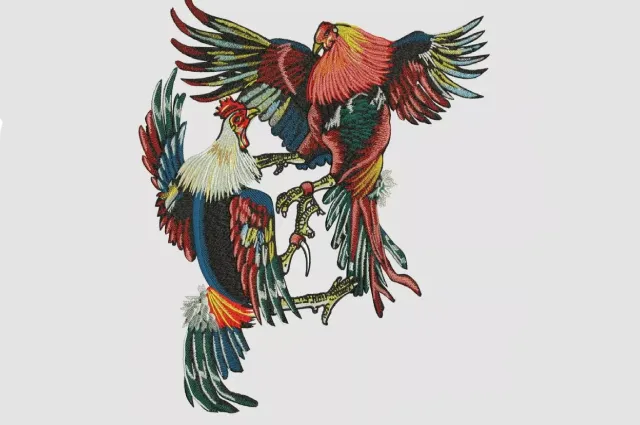
When it comes to embroidery, digitizing photos is more complex than simply printing an image on fabric. Embroidery digitizing involves converting the photo into a stitch file that an embroidery machine can read. Unlike prints, which rely on ink, embroidery relies on threads to recreate the image. This requires special software, skilled digitizers, and an understanding of how stitches will look on different fabrics.
Using professional embroidery digitizing services ensures that the photo is accurately translated into an embroidery-ready format. These services provide expertise in dealing with complex designs and can adjust the image to fit the limitations of embroidery while retaining its core elements.
Digitizing photos for print and embroidery requires attention to detail, a good understanding of resolution and color accuracy, and the use of professional tools. When done correctly, photo digitization ensures that the printed or embroidered product retains the clarity, detail, and impact of the original image.
For embroidery, the process goes a step further, as the design must be converted into a format that an embroidery machine can read. By utilizing expert embroidery digitizing services, individuals and businesses can ensure that their embroidered products are of the highest quality, whether they are creating custom clothing, accessories, or promotional items.
A1: For print, a resolution of at least 300 DPI (dots per inch) is recommended to ensure clarity and detail. For larger prints, scanning at 600 DPI or higher is advised.
A2: While most photos can be digitized for embroidery, highly detailed images with complex gradients may need to be simplified to achieve the best results. A professional embroidery digitizer can help adapt the image for stitching.
A3: Printing reproduces the image using ink, while embroidery digitizing translates the image into a stitch file that an embroidery machine uses to stitch the design onto fabric. Embroidery adds texture and durability but may require simplifying the design.
A4: The best file formats for printing high-quality digitized photos are TIFF and PNG. These formats retain all the image data without compressing it, ensuring that the quality remains intact.
A5: Embroidery digitizing services carefully select thread colors that closely match the original image. While exact matches may not always be possible due to the limited range of thread colors, skilled digitizers ensure that the final product is as accurate as possible.
A6: Yes, photos can be digitized for both print and embroidery, but the process differs. For print, high resolution and color accuracy are the focus, while for embroidery, the image must be adapted to suit stitch types and fabric constraints.

All Rights Reserved © 2023